Project-sites Setup
Prerequisites
Note! In order to be able to use project-sites, you need to have the extension zip file OmniaX.ProjectSites.zip and have an Omnia QMS project already setup.
Install and Setup Project Sites
- Go to Omnia Admin > System.
- Register this extension. This is done by first registering the extensionId which can be found inside the zip file, under extension.json.
- Go back to System > Extensions, and Upload the OmniaX.ProjectSites.zip file.
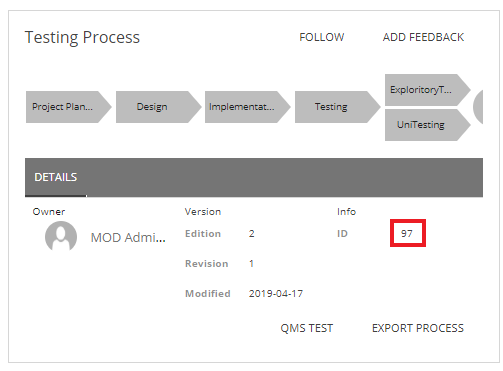
- Once the file has been uploaded, make sure to fill in the processidtemplate1 field with the correct template it. It can be found in the process-viewer of your Omnia QMS site.
- Make sure to fill in the Omnia QMS site url, which is the site url of your Omnia QMS app that you wish to activate project-sites on.
- Make sure to fill in the Omnia QMS web api url, which is the url of the server that your intranet is built upon. An example is https://omniaext1.azurewebsites.net/api.
- Click save.
- Go to Omnia Admin > Features.
9. Make sure that the following tenant scoped features are activated: - OmniaX Project Site Core - OmniaX ProjectSite-TentantBundle - Omnia Angular1 Support
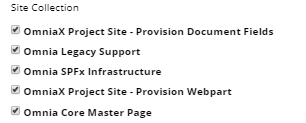
10. Make sure that the following site collection scoped features are activated: - Omnia Core Master Page. - OmniaX Project Site Provision Document Fields. - Omnia Legacy Support. - Omnia SPFx Infrastructure. - OmniaX Project Site Provision Webpart.
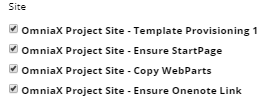
11. Make sure that the following site scoped features are activated: - Omnia Team Site - Prerequisites - OmniaX Project Site - Example Site
- Go To Omnia Admin > Site Templates > Add template.
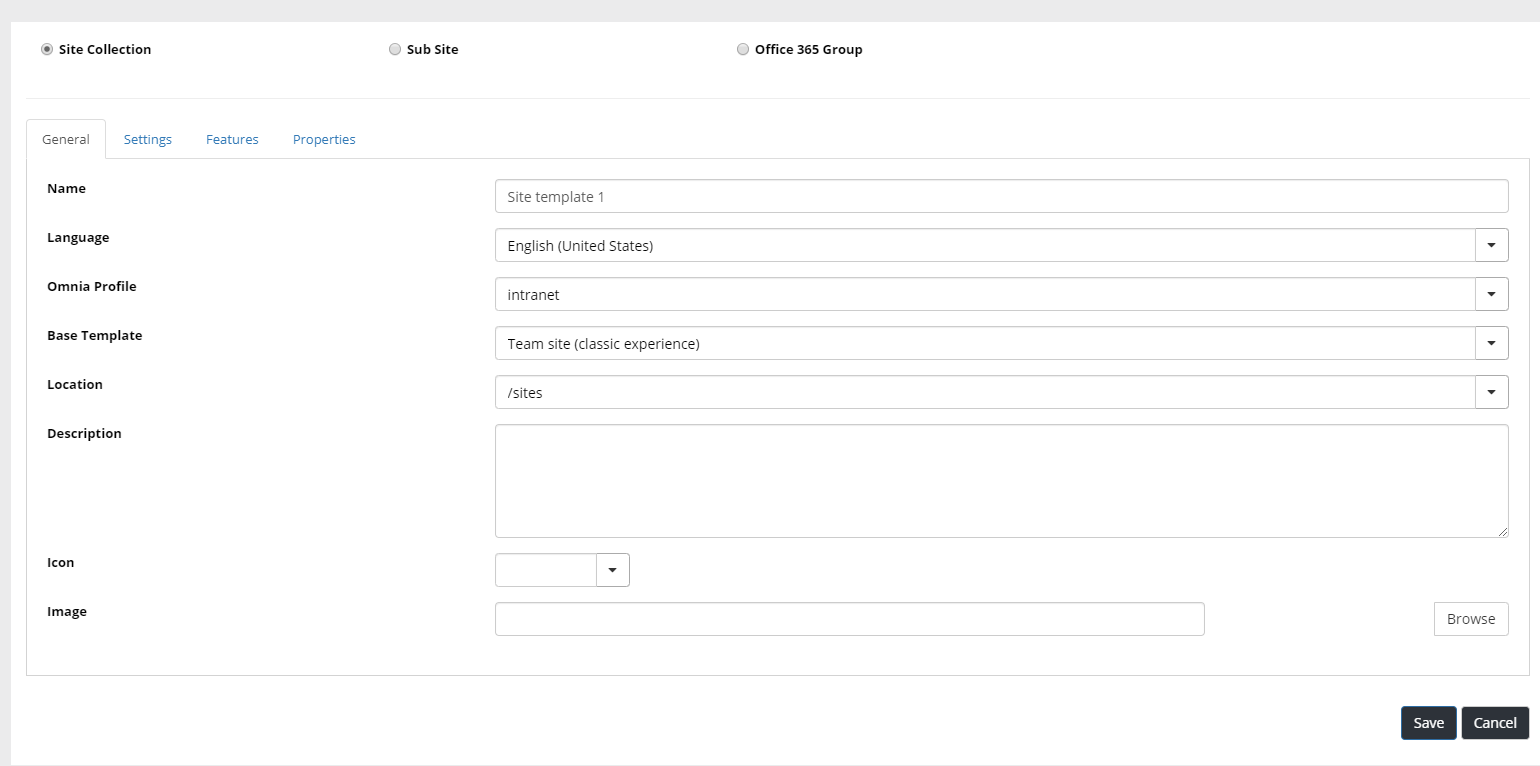
- Name the template site template 1.
- Make sure to have the language selected as your prefered language.
- Make sure to choose the correct Omnia Profile for your intranet.
- Make sure that the base template is Team site (classic experience).
- Make sure that it has the correct location.
- Go to the features tab and make sure that these Site Collection and Site features are checkmarked:
- Go to the properties tab and add the properties you wish your project-site template to have. An example would be the following:
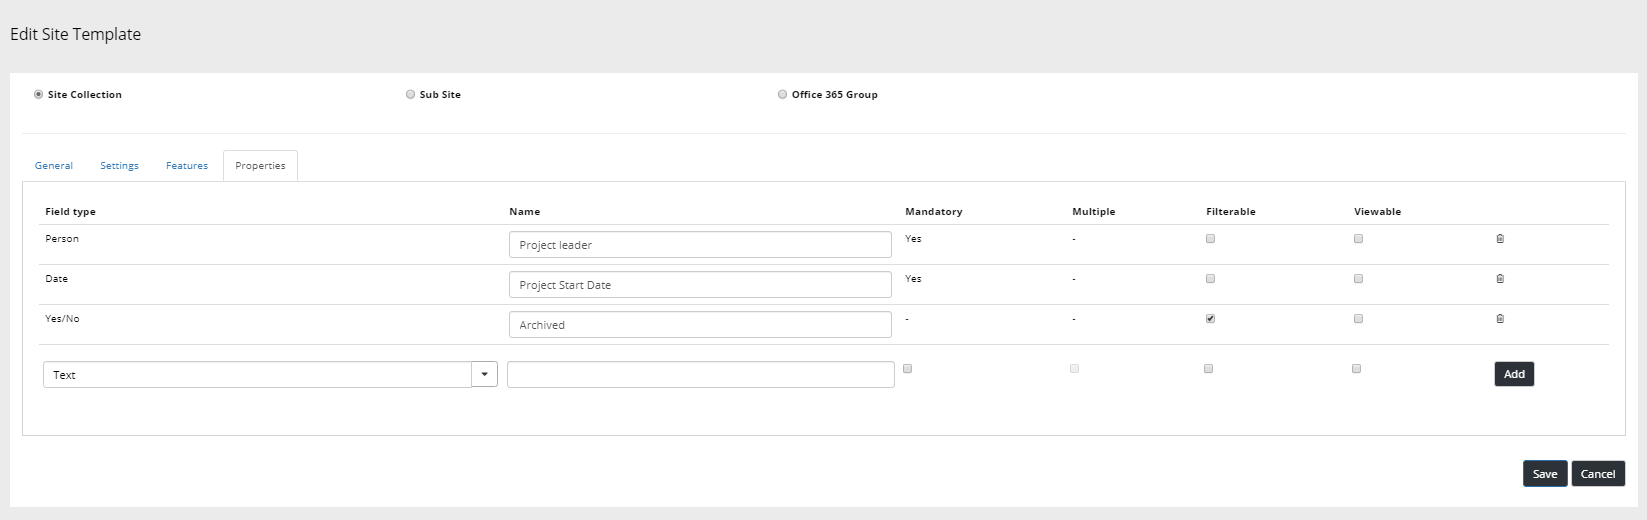
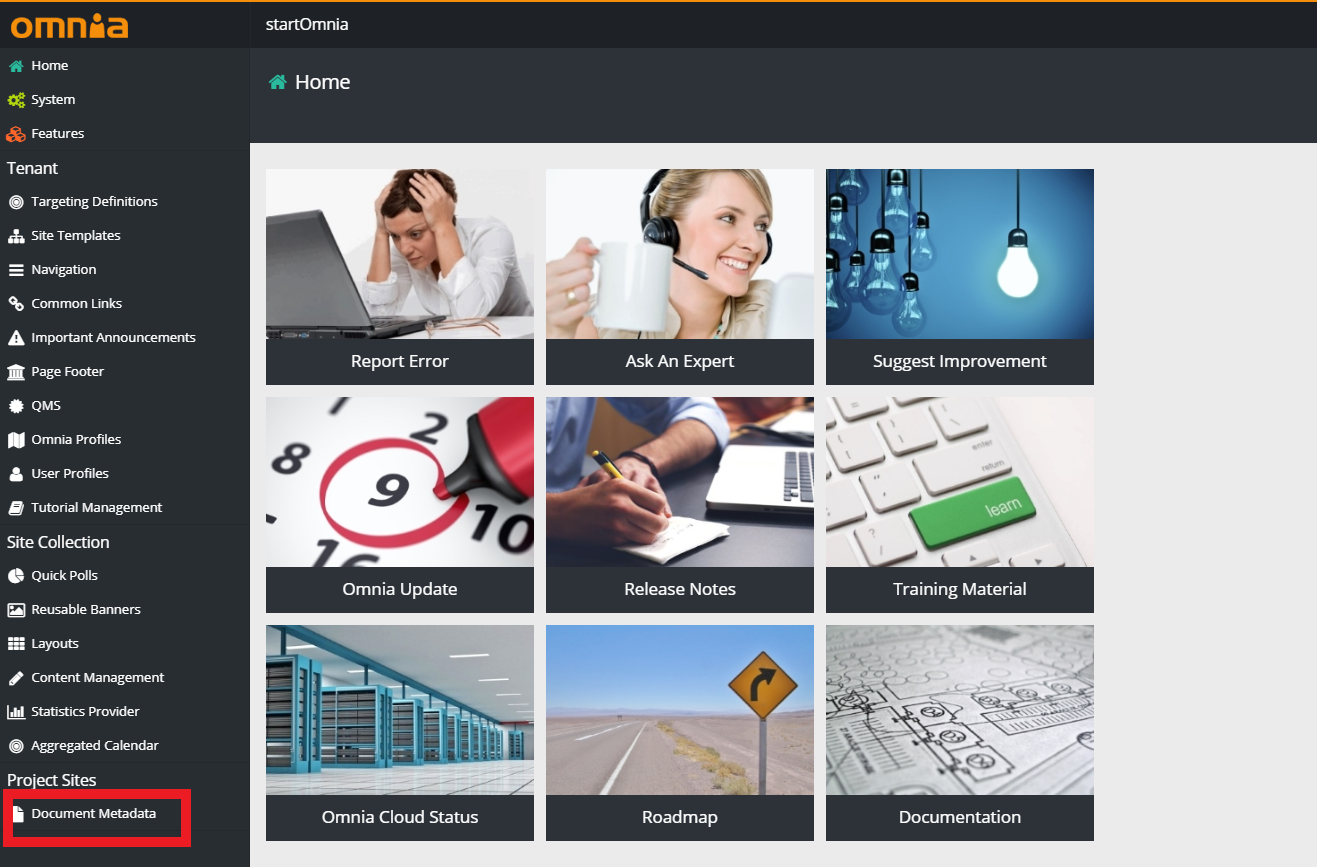
- Go to Document Metadata.
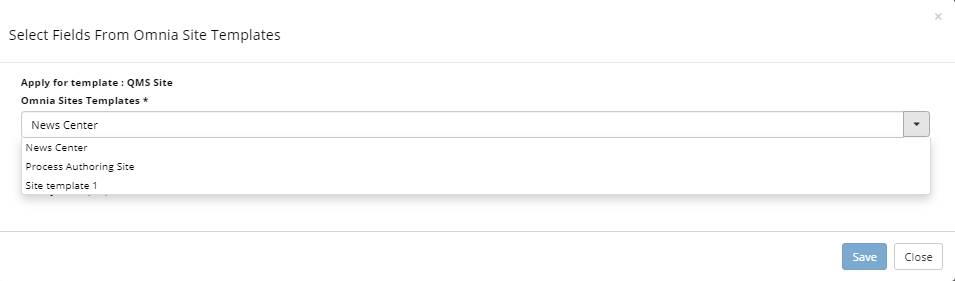
- Click on the Select Fields From Omnia Site Template button.
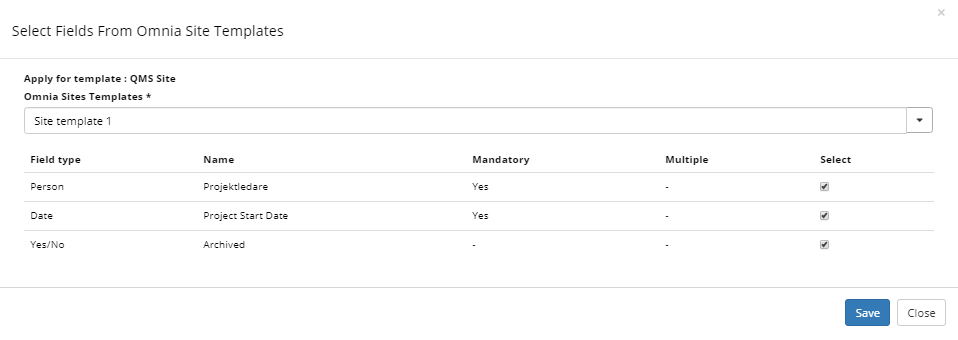
- Select site template 1 that we created earlier.
- Select all the fields that we created earlier, then click save.
- The next step is to create a new site for our project sites. Go to the intranet homepage where you have your Omnia QMS setup and click on my sites button, then create new site.
- Choose site template 1.
- Enter Project Sites in the title field. You may enter an optional description to the site. When you are done, click next.
- Fill in the fields of the properties that we have previously selected. Make sure to fill in the ones that are required, then click next.
- In the owner field, enter the name of the site administrator.
- In the members field, enter the name of the members that you wish to have the ability to edit the site.
- in the readers field, enter the name of the members that will only be able to read the site, without having editing capabilities.
- Click Create.