Create Document Wizard
The Omnia Create New Document Wizard can be used in any site in the tenant, to create new documents, both Controlled Documents and “normal” documents, based on templates set up in the Document Management Settings. Regarding Controlled Documents a new document can even be based on any published Controlled Document.
Note! The Create Document Wizard can be set up to be available for both “normal” documents and Controlled Documents, for normal documents only, or for Controlled Documents only. This is done through settings in Omnia Admin.
When this Site feature (“Omnia Document Management Create Document Wizard”) is activated for a site, the Omnia Wizard replaces the standard options for “New” in classic document libraries and “Add” in “Controlled Documents” libraries.
The Wizard works slightly differently for Controlled Documents and for “normal” documents. Here’s an example when used for normal documents:
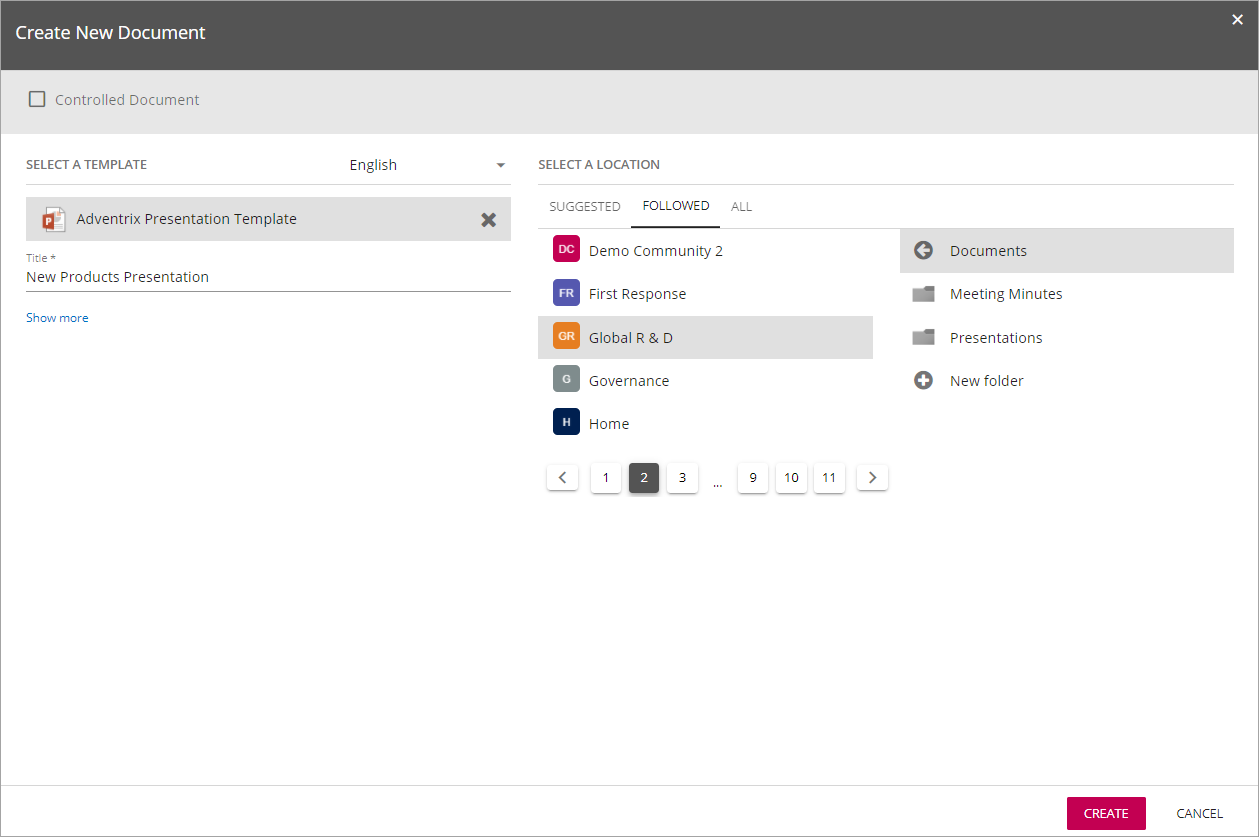
When used for “normal” documents the steps are as follows:
- Select template. (You can search if the list is long.)
- Add a title for the new document.
- Select list of team sites: SUGGESTED, FOLLOWED or ALL. Default is the site where the wizard was started, shown under SUGGESTED. When ALL is selected, the user can search for any site the user has access to.
- Select a team site to save the document in (in the Documents library there).
- If applicable, select a folder in the chosen site (in the Documents library there), or create a new folder.
This means any user can use the wizard from any site where the feature is activated to create a document, and save it in the Documents library in any other site that user has access to.
Here’s an example when used for Controlled Documents:
Any author of Controlled Documents can use the wizard to create a Controlled Document in any Controlled Documents libary the author has access to.
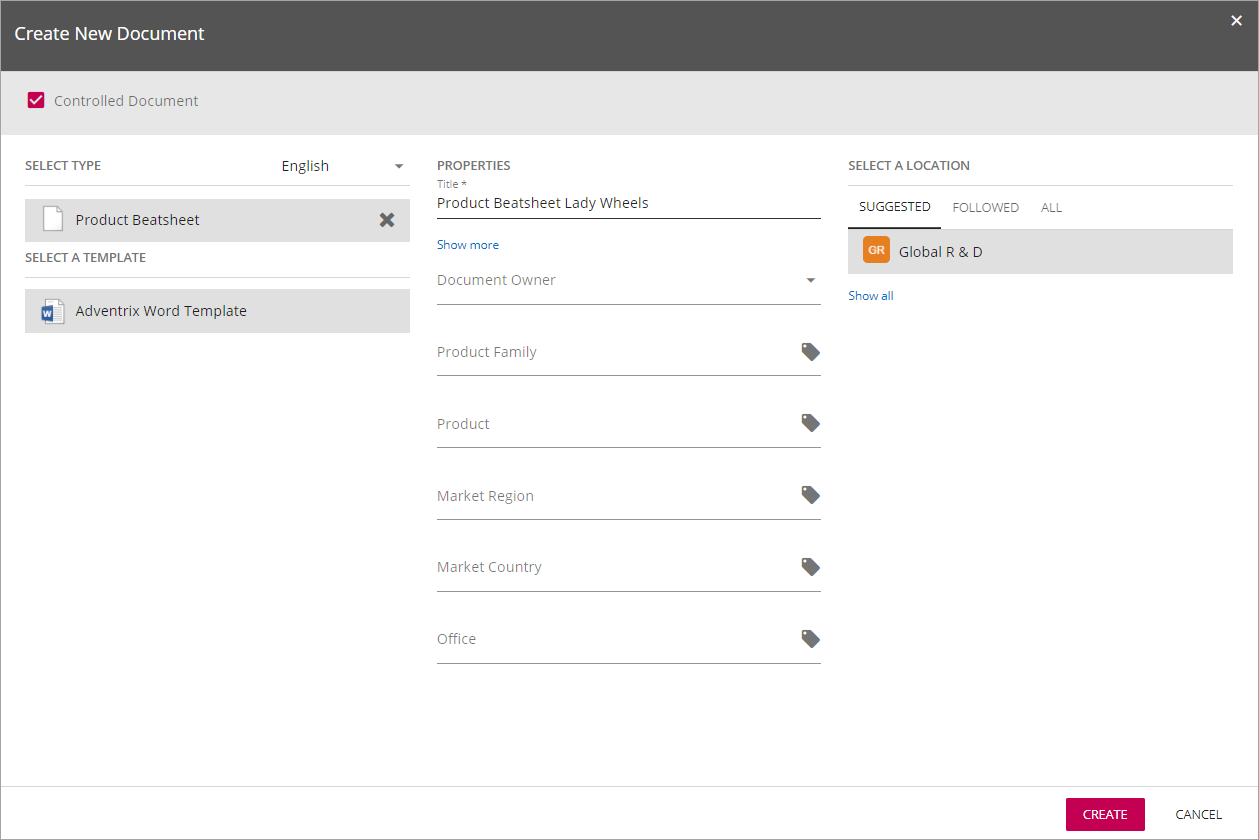
When used for Controlled Documents, the steps are as follows:
To the left:
- Select type of document to create.
- Select a template. (You can select ALL if the template you want is not listed under SUGGESTED.)
In both cases you can search if the list is long.
In the middle:
- Type a name for the document.
- Add properties as needed. (This is normally very important. Properties are needed for search and for example to display documents in the correct lists.)
To the right:
- Select the team site where the document will be saved in the Controlled Documents library.
Only team sites with a Controlled Documents library, and that the author has access to, are shown inte list. Default site is where the wizard was started, shown under SUGGESTED. When ALL is selected, the user can search for any site he or she has access to.
File names for documents
If you need to check the file name for the document, when you have entered a title, click “Show more”.
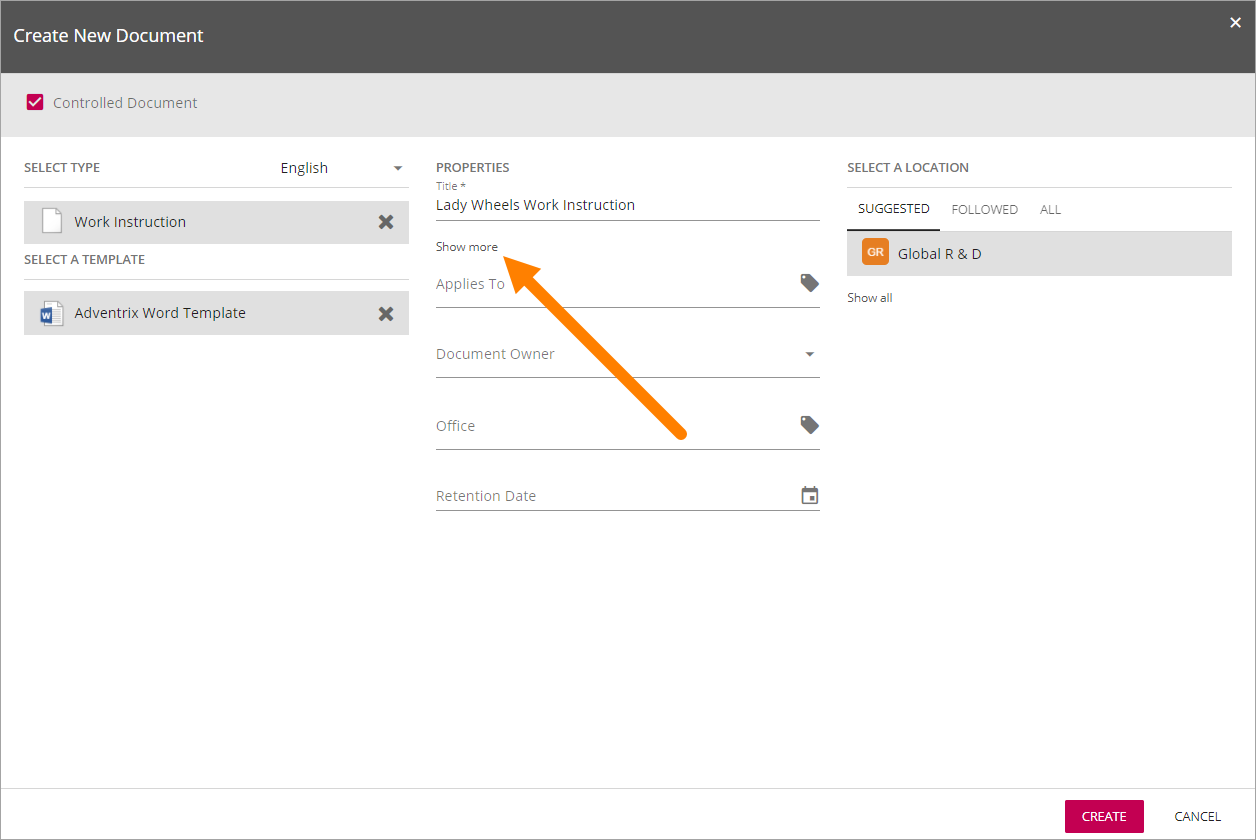
If need be, the file name can now be edited:

Tip - Create documents from a Controlled Documents Viewer
If set up that way, it can be possible for users to create documents from a Controlled Documents Viewer, using the Create Document Wizard. See this page for more information on how to do that: Create a document from the Controlled Documents Viewer