My Links
The My Links control makes it possible for the logged on user to have quick access to resources that are often used. The control will display links that are mandatory, links that the user have selected from the Common Links list, and personal links the user has created.
The My Links control is part of the Cross Site Header and is shown across all SharePoint sites in Omnia. My links can also be added separately to any legacy page as a web part or to a Quick Page as a block, to for example display the users last visited links.
Here’s an example of My Links in the Cross Sites Header:
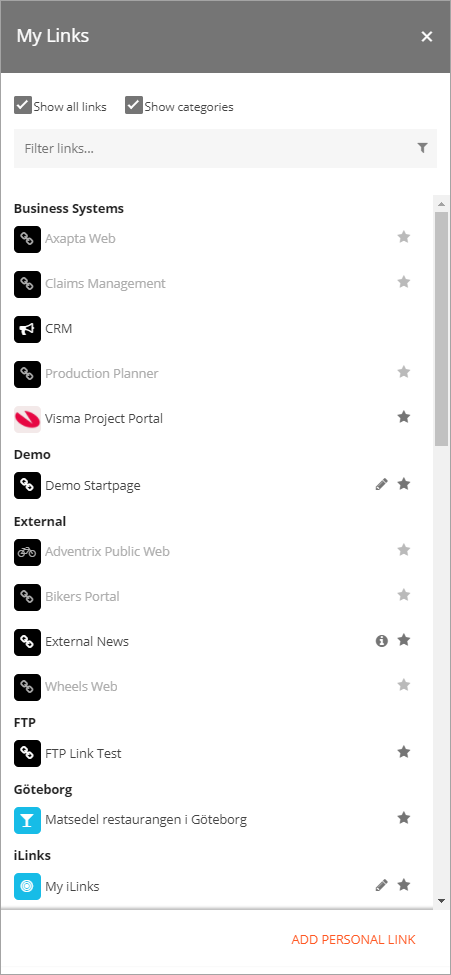
- Show all links: Select to show all common links.
- Show categories: Select to show category headings for the links. If not selected the list of links is shown in alphabetical order. If selected the list is shown, sorted on the category headings, in alphabetical order (as in the image above).
- Filter links…: The list can be filtered using this field.
- Add personal link: This option can be used to add personal links to the list, see below.
Available icons to the right in this list is used this way:
 This icon can be clicked to select to show, or not to show, a non-mandatory link. A black star indicates that the link will be shown, a grey star that the link will not be shown. Note: if the user selects “Show all links”, all common links are always shown, regardless of this selection. Also note the important difference when used for personal links. When the star is clicked for a personal link, the link is removed.
 This icon indicates that information about the link is available, and can be read by clicking the icon.
 This icon can be clicked to edit a personal link.
Adding personal links
A user can add a personal link by clicking the option “ADD PERSONAL LINK” and using the following settings:
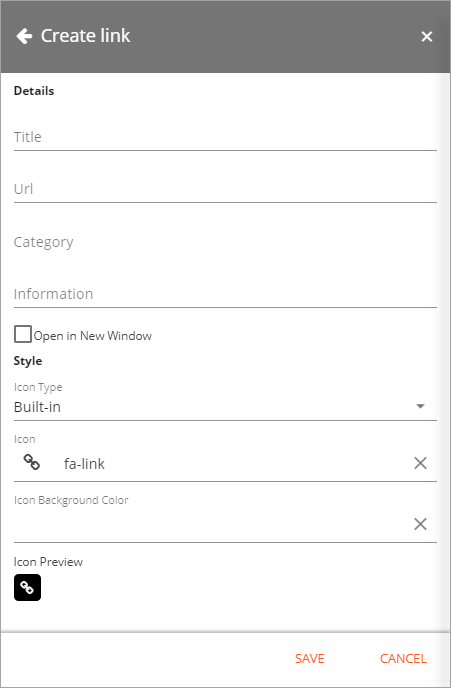
- Title: The title for the link, shown in the list.
- Url: The link url.
- Category: Links that share the same category will be grouped together when “Show categories” is selected.
- Information: It is optional to add information about the link. If added, an i-icon will be shown.
- Open in New Window: Defines whether to open the link in a new window or not.
- Icon: The user can select from built-in icons based on Font Awesome or any image uploaded to a document library in SharePoint.
- Icon background color: The background color for the icon here. If not set the default icon background color will be used.
My Links Web Part and block
My links can also be added to any legacy page as a web part and to any Quick Page as a block. Mandatory links, links the user have selected and personal links will be displayed. The links list can not be altered through the web part/block. The my links web part/block settings are web part scoped.
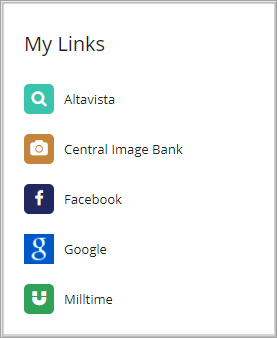
Here’s an example where My Links is used as a block:
Settings for the control
The following settings are available:

General
On the General tab you can set the following:
- Title: Add the title to be displayed for the web part/block.
- Sorted by: Choose to sort the list alphabetically or in order by last visited.
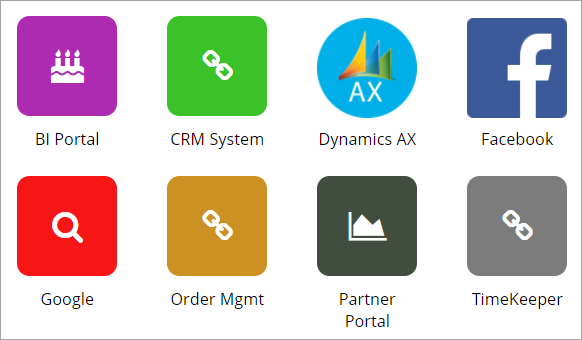
- View Template: Select how to display the links, as a simple list or as app icons. (See below for some examples app icons.)
- Item Limit: The maximum number of items to display before a “Show more” link appears.
Here’s some examples of app icons:
Custom Colors
You should primarily set colors through Theme colors in Omnia Admin (System/Settings/Default colors). If you still would like custom colors for the control, you can set them using this tab.
